
How to make amazing pizza at home using the Ooni Fyra 12
Aug 06, 2021
Thea, our newest team member and long time pizza fanatic, passes on some secrets for getting the best out of the Fyra 12 Ooni pizza oven.
As a big foodie, I was thrilled when I first found out that we stock the Ooni Fyra 12 pizza oven here at Meander. Judging by the number of times I've heard “Oooh, they sell the Ooni oven!” from shoppers as they pass our store front on George Street, you may well have heard about these wonderful things too. However, if you haven’t, Ooni is an Edinburgh-based brand, specialising in affordable, yet superb, pizza ovens.
Ooni was created by husband-and-wife team Kristian Tapaninaho and Darina Garland, after Kristian struggled to make restaurant-quality pizza using his kitchen oven. After searching far and wide for a wood-fired pizza oven that didn’t break the bank, Kristian opted to create his own. And from that, the Ooni oven was born – the world’s first ever portable wood-fired pizza oven. Ooni describe their ovens as being fast, cost-effective and “kick-ass”, and I couldn’t agree more.
I first came across Ooni when buying a pizza from a pizza truck at a food festival. I couldn’t quite believe that such amazing pizza, better than some I’d had in Italy, had been made in the back of a van. Prior to this revelation, I had always thought that the delicious, Neapolitan-style pizza I loved so dearly would only ever be attainable from home if I forked out thousands on building a hefty pizza oven. But I was wrong. With the Ooni, you can make delicious pizza, pretty much wherever you please, and your bank account isn’t going to hate you for it either.
@renespizzaplace
Fun fact: Ooni was originally named ‘Uuni’, which is Finnish for oven.
You can have the perfect cooking environment for making pizza in the Fyra 12, but if the dough isn’t good, you may be disappointed with your outcome. However, once you know what works and what doesn’t, getting the dough right is so easy, and will produce amazing results.
Getting the dough right
The recipe I like to use is extremely simple, and makes around eight pizzas, depending on how big you’d like them to be. There are just four ingredients: 1kg 00 flour, 30g salt, 600ml room-temperature water, and yeast (1–2g fresh or half a teaspoon of dry).
If you follow a pizza dough recipe from a home-cooking cook book, it’s likely that the recipe will also include sugar, or oil, or both. This is by no means wrong, it’s just that it makes more sense to include these ingredients if you’re using a kitchen oven rather than a pizza oven. Both sugar and oil help dough to caramelise; in domestic ovens (that only tend to reach about 250ºC), they’ll help the dough to go lovely and golden brown. However, in Ooni temperatures of around 500ºC, the dough most definitely does not need that helping hand. In fact, unless you really love a sweet dough, I would recommend omitting these ingredients, as the dough is likely to burn if they’re included.

Photo by Nadya Spetnitskaya on Unsplash
Tip: Get perfect room-temperature water by using a third boiled water and two-thirds cold water.
So, let’s talk abour flour. Why should you use 00 flour rather than the normal stuff you can get at the supermarket? Truthfully, you can use standard bread flour. However, as the gluten content is lower in 00 flour, it not only makes the end product better (that is, it makes a softer and springier crust and a thinner, crispier base), it also makes the shaping process far easier for you. If you use bread flour, your pizza will no doubt still taste great, but just be prepared to spend longer shaping the dough, as the gluten will cause it to keep springing back into a ball. And expect a chewier crust – again, because of the gluten.
You can get 00 flour pretty easily online, and I like to buy it in bulk so that it works out cheaper. It’s also definitely worth trying your local deli, but it may be more expensive than buying it in bulk online.
Prepping the dough is, once again, really simple. If you want to knead your dough by hand, then put all your dry ingredients into a bowl and combine them using your hand. Then add the water, and, once again, combine. Once a sticky, rough dough has formed, turn it out onto a floured work surface and start kneading. The optimum time for kneading is around eight minutes, but it’s best to gauge when it’s ready through feel and appearance. If it’s smooth, pillowy, and silky, and easily forming a ball, it’s done.
Alternatively, if you’re feeling lazy (as I often am), a stand mixer with a dough hook will also do the job. Just remember to combine the dry ingredients first and keep an eye on it to ensure you don’t over-work it. Again, it should take around eight minutes on a low–medium setting.

@renespizzaplace
Prove it
Proving helps the dough rise and form air bubbles, so, the better the prove, the better the pizza crust. If you’ve been aiming for a bubbly, airy, pillowy crust, then this is a step you won’t want to miss. Once I have a large ball of dough after kneading, I like to initially prove it for two hours in a warm environment until it has doubled in size. It’s also important that the dough is covered, and so I have a proving tray which I oil before placing the dough inside. However, a standard baking tray will also work; just be sure to cover the dough with a tea towel or cling film.
Once the dough has doubled in size, it’s ready to split into dough balls. With the recipe I use, I split it into eight balls, which weigh around 200g each. I shape the dough into balls by folding the dough under itself … and if my explanation isn’t the best, you can definitely find a YouTube tutorial showing you how to form a ‘boule’.
From this stage, the proving is pretty much up to you. If you want to enjoy your pizza on the same day as making the dough, I’d recommend proving it in a warm environment until it has doubled in size again. However, if you’re feeling patient, then I would definitely try proving it overnight, or even better, for 24 hours, in the fridge. This slows down the pace of the prove, while still giving the dough time to produce more flavour through fermentation. You can actually do this for two or three days, but I have never been patient enough or brave enough to get on my family’s nerves by taking up a whole fridge shelf for three days.

Photo by Jason Jarrach on Unsplash
It’s all in the shaping
When I think back to my clueless self many years ago, rolling out the pizza dough with a rolling pin, my heart aches for all those poor little air bubbles I killed. After you’ve patiently waited for the dough to rise, the last thing you want to do is erase all of your hard work by knocking the air out of it with a rolling pin. Instead, start shaping your dough balls by pushing down the middle with your fingers and working outwards. Make sure you’re only ever pushing down the middle and not the edges – the edge will soon be your thick, airy crust, so keep it safe and as untouched as possible.
After pushing from the middle outwards for a while, you should have a small, fat-crusted pizza shape. This is where you want to start letting gravity do the work. Hold the crust and start turning the pizza base round and round, while carefully stretching out the dough. This should help make the base larger and thinner. Ultimately, you’re aiming for an extremely thin base – one that you can see light through – and then a thicker crust round the edge. Aim for it to be around 1cm deep and wide. If you’re after a nice thick crust, try and stop yourself from going overboard and leaving the crust really thick before cooking. Remember, it’s going to grow a fair bit in the oven!

@renespizzaplace
And to top it all off…
Okay, this is the easy bit. You can’t really go wrong with the toppings, because it’s all about choosing what you would put on your dream pizza. However, spending a little extra time on making a great tomato sauce will definitely help your pizza go from great to truly wonderful. For the sauce, I like to lightly fry off two or three garlic cloves in a tablespoon (maybe a little more) of olive oil until fragrant. Then, I add two cans of chopped or plum tomatoes, basically, whatever I have in the cupboard, and mash them down to a pulp using a potato masher. Then, I simmer the tomatoes on a low heat for around 20–30 minutes, until the sauce is no longer watery. Lastly, I season with salt and pepper to taste. The cult favourite tinned tomatoes to use on Neapolitan-style pizza is San Marzano. They are good quality and sweet, so they are a great option. However, I tend to use bog-standard tinned tomatoes and I love the outcome all the same.
For mozzarella, try to avoid anything that is too wet, as you want to try and avoid sogginess. You can buy matured mozzarella, but I struggle to find that in most supermarkets, so instead I just wring out my mozzarella balls into the sink and then let them sit on some paper towel before I use them, and that does the trick.
As I said before, the toppings are up to you. The only thing I would say is that you’ll want to add certain ingredients after cooking your pizza in the Ooni, rather than before. Toppings like olives, mushrooms, and courgettes are totally fine to go on before you cook. However, I’d leave things that might burn or dry out easily, like prosciutto, basil and rocket, until after. It’s all about trial and error, and it doesn’t take long to figure out what does and doesn’t work for you.

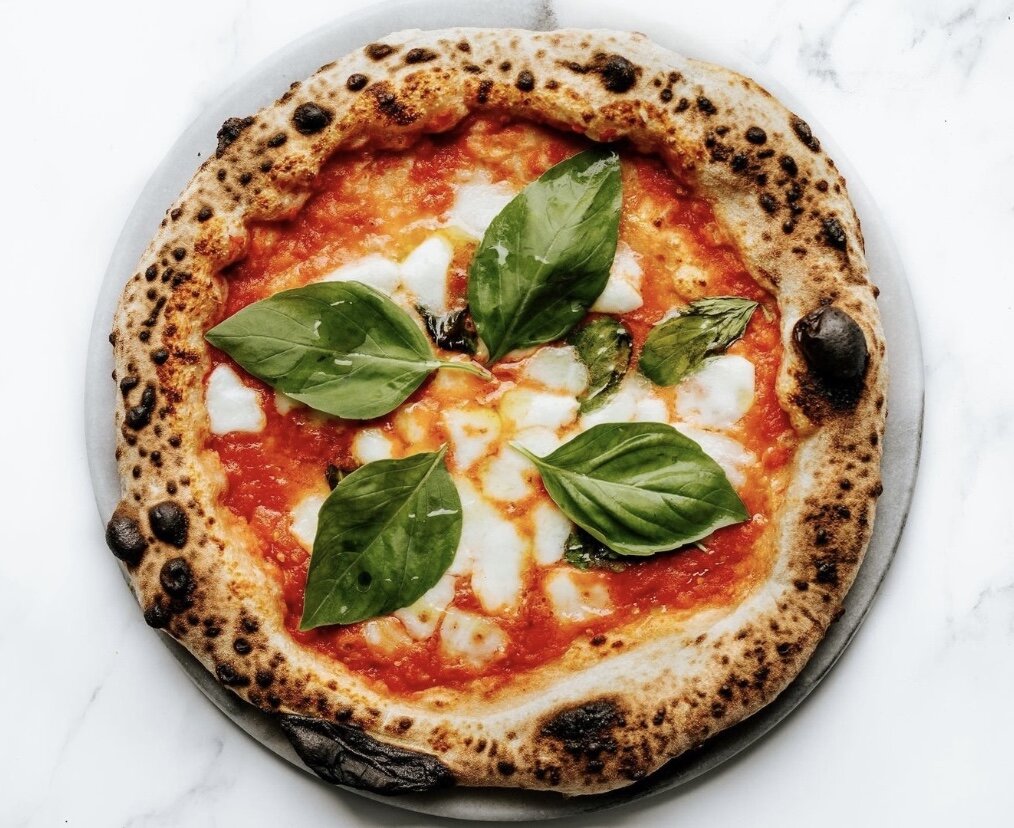
My latest effort yesterday. I can confirm it was delicious!
A few tips for using your Ooni
A pizza peel will be your best friend. Trust me, if you buy anything to go with your Ooni oven (other than fuel of course), then please make it this. I’m really not sure how I’d go about getting my pizza in and out of the Ooni without one, as it helps get your pizza right to the back of the oven (a few inches away from the flames is best), and allows you to slide it in and out without burning yourself. It’s a bit of a must. When using your peel, I’d suggest you sprinkle a small handful of flour or semolina over it before transferring your pizza base on to it. From there, quickly add your sauce and toppings, and then get your pizza into the oven as soon as you can, to prevent your toppings from making the base wet and subsequently sticking to the peel. You can get both wooden and metal peels – personally, I prefer metal as they’re a little lighter and easy to clean.
Tip: If your pizza is sticking slightly to the peel, lift the edge of the pizza closest to you and blow underneath the base. This should help the dough lift from the peel.
An infrared thermometer with a laser pointer has become something of a staple for me, as it tells you how hot the oven is. You’re aiming for around 400ºC – and the oven can get a fair bit hotter than this – so be sure to wait a little until your Ooni hits the right temperature. That way, you’ll avoid completely obliterating the pizza. If you don’t have a thermometer, I recommend waiting until the flames are still present, but aren’t too big.
Heat-proof oven gloves are also great to have. The Ooni oven gets seriously hot, so it might be an idea to wear these when adding fuel.
So, how long does it take to cook the perfect pizza in an Ooni? It really shouldn’t take much longer than 60–90 seconds. Once my pizza’s in the oven, I shut the door, count for 15 seconds, then pull the pizza back out of the oven on my peel and rotate it a quarter of the way round. Then, I repeat the process, usually only three more times, and the pizza is pretty much always perfectly cooked. When you’re pulling out your pizza, if you notice the edges are too burnt for your liking, simply avoid placing it so close to the flames next time you put it back in.
The placement of your Ooni can actually make a difference to how effective it is in cooking your pizza. This is definitely something to keep in mind, especially in Scottish weather. Make sure you angle the oven in a way that will prevent strong wind entering it, as that can cause its temperature to drop and kill the flame.
Lastly, once you’ve enjoyed copious amounts of delicious pizza, you’ll want to make sure your Ooni’s nice and clean for the next time you use it. To do this, crank up the heat to burn off any food that’s been left on the stone. Then, once the oven is completely cool, simply wipe off any ashes with a dry cloth.

